Sarah stared at her living room wall with a mixture of frustration and dread. After taking down her holiday decorations, what should have been a fresh start for the new year had turned into an ugly reminder of past DIY mistakes. Scattered across the white paint were dozens of old wall plugs, some protruding like tiny plastic mushrooms, others buried so deep they looked like permanent scars.
She’d tried the obvious approach last weekend—grab each plug with pliers and yank. The result? Three gaping holes that looked like someone had attacked her wall with a chisel, plus a growing list of repair jobs that would eat up her entire Saturday. Sound familiar?
You’re not alone if wall plug removal has left you with battle scars across your walls. But there’s a surprisingly simple method that professional decorators use to extract even the most stubborn plugs without leaving a trace.
Why Your Wall Plugs Fight Back So Hard
Here’s the thing about wall plug removal that most people don’t realize: these little plastic anchors are specifically designed to resist being pulled out. When you installed them, they either expanded inside the drilled hole or opened like an umbrella behind drywall to create maximum grip.
“Wall plugs are engineered not to come out easily,” explains veteran contractor Mike Henderson. “When homeowners try to force them out, they’re fighting against the plug’s core design feature.”
The physics working against you are brutal. Whether you’re dealing with standard nylon plugs in brick walls or metal cavity anchors in plasterboard, pulling straight out puts all the stress on the weakest point—the brittle plaster or drywall around the hole.
The typical result? Chipped paint, conical craters much larger than the original drill hole, and sometimes hairline cracks radiating outward. What started as a simple refresh turns into a major repair job requiring primer, paint, and possibly professional help.
The Professional’s Secret: Control Over Brute Force
Professional contractors rarely struggle with wall plug removal because they understand one key principle: you need to work with the plug’s design, not against it. The trick involves creating a secure grip point, then using controlled leverage instead of raw pulling force.
Here’s your complete toolkit for trace-free wall plug removal:
- A screw that fits snugly inside the plug opening
- Flat-nose or needle-nose pliers with good grip
- A screwdriver matching your screw head
- Quality wall filler (ready-mixed works best)
- A flexible filling knife or putty knife
- Fine-grit sandpaper (120-180 grit)
- Primer and matching paint for touch-ups
“The screw becomes your handle,” says professional painter Lisa Torres. “Instead of trying to grab smooth plastic, you’re gripping something designed to be turned and controlled.”
| Wall Type | Best Screw Size | Removal Technique | Expected Time |
|---|---|---|---|
| Drywall/Plasterboard | 3-4mm diameter | Gentle rocking motion | 2-3 minutes |
| Brick/Masonry | 4-5mm diameter | Slow extraction with pliers | 3-5 minutes |
| Concrete Block | 5-6mm diameter | Wiggle while pulling | 5-8 minutes |
Step-by-Step: The Damage-Free Method
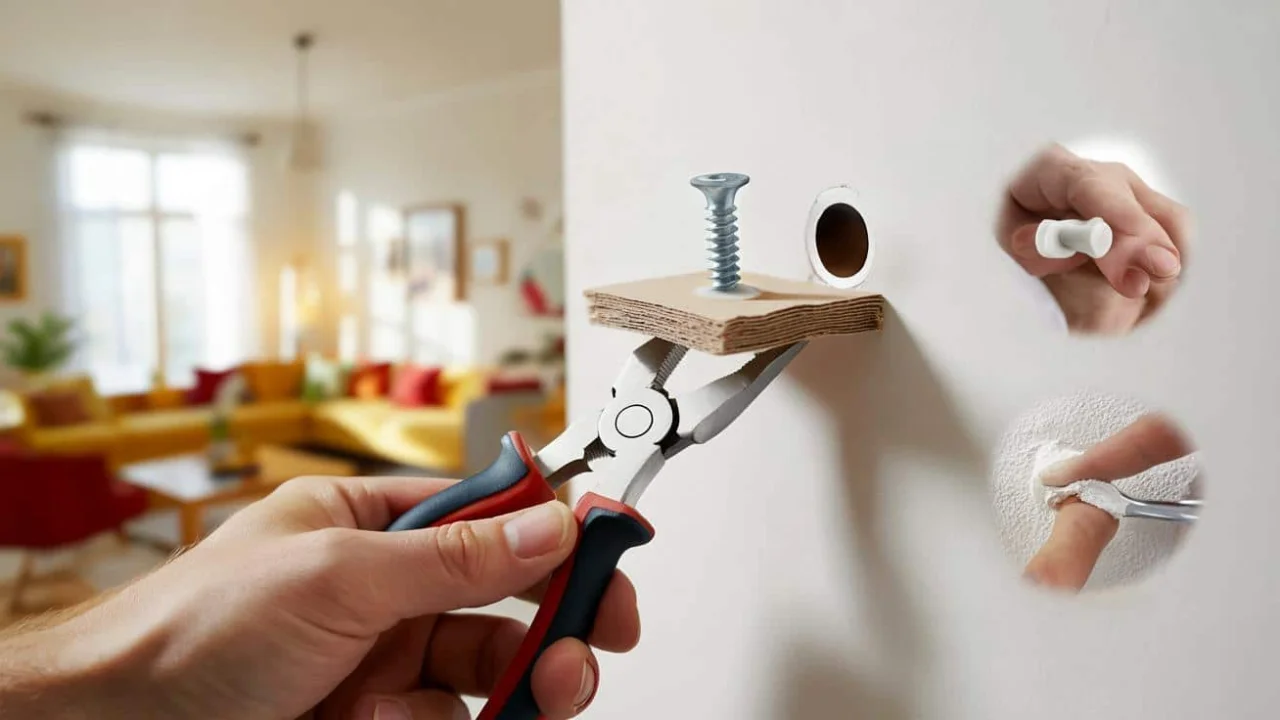
Start by threading your screw into the wall plug opening. Don’t drive it in too deep—you want about half the screw length inside the plug, with plenty sticking out to grip. This creates your extraction handle.
Now comes the crucial part: instead of pulling straight out, use your pliers to grip the screw head and gently rock it back and forth. You’re gradually loosening the plug’s grip on the surrounding material.
For cavity wall plugs, you’ll feel the moment when the anchor mechanism releases behind the wall. For solid wall plugs, the rocking motion gradually works them free from their wedged position.
“Patience pays off here,” notes DIY expert James Crawford. “Rushed extraction almost always means repair work later.”
Once the plug starts moving, maintain that gentle rocking motion while gradually increasing the outward pressure. Most plugs will slide out surprisingly easily once you’ve broken their initial grip.
What Happens When You Get It Right
Perfect wall plug removal leaves you with a clean, round hole that’s exactly the size of your original drill bit. No chipped paint, no damaged plaster, no stress fractures radiating outward.
This clean hole is incredibly easy to fill. A small amount of quality filler, smoothed flush with the wall surface, will disappear completely once painted. Many homeowners are amazed at how invisible the repair becomes.
The time savings alone make this method worthwhile. Instead of spending a weekend repairing damaged wall sections, you can complete wall plug removal and filling for an entire room in a few hours.
Professional decorators often charge premium rates for “invisible” plug removal and repair. Master this technique, and you’re saving both money and the frustration of living with damaged walls while waiting for repairs.
When Things Don’t Go According to Plan
Even with the best technique, some plugs refuse to cooperate. Older plugs that have been in place for years sometimes break apart during removal. Metal plugs in particular can snap, leaving fragments inside the wall.
Don’t panic if this happens. For broken plastic plugs, you can often push the remaining pieces deeper into the hole and fill over them. For metal fragments, a small masonry bit can carefully drill them out without enlarging the hole significantly.
“About 10% of wall plug removal jobs hit complications,” admits contractor Sarah Williams. “But even the tricky ones are manageable with the right approach.”
The key is recognizing when to stop applying force and switch strategies. If a plug isn’t responding to gentle extraction, it’s better to drill it out completely than risk wall damage.
FAQs
How do I know if a wall plug will come out cleanly?
Gently wiggle the plug with your fingers first. If it moves at all, it’s a good candidate for clean removal. Completely rigid plugs may need drilling out.
Can I use any screw for wall plug removal?
The screw should fit snugly in the plug opening without being too tight. Wood screws work better than machine screws because of their aggressive threads.
What’s the best filler for plug holes?
Ready-mixed lightweight filler works well for most applications. For large holes or exterior walls, use a two-part filler for extra strength.
How long should I wait before painting over filled holes?
Most fillers are ready to paint within 2-4 hours, but check the manufacturer’s recommendations. Ensure the filler is completely dry and sanded smooth.
Should I use primer before painting over filled areas?
Yes, especially on previously painted walls. Filler can absorb paint differently than the surrounding surface, creating visible patches without proper priming.
What if the wall plug keeps spinning instead of coming out?
This usually means the plug’s expansion mechanism has failed. Try pushing it slightly deeper while turning, which sometimes resets the mechanism, then attempt removal again.
Related Posts