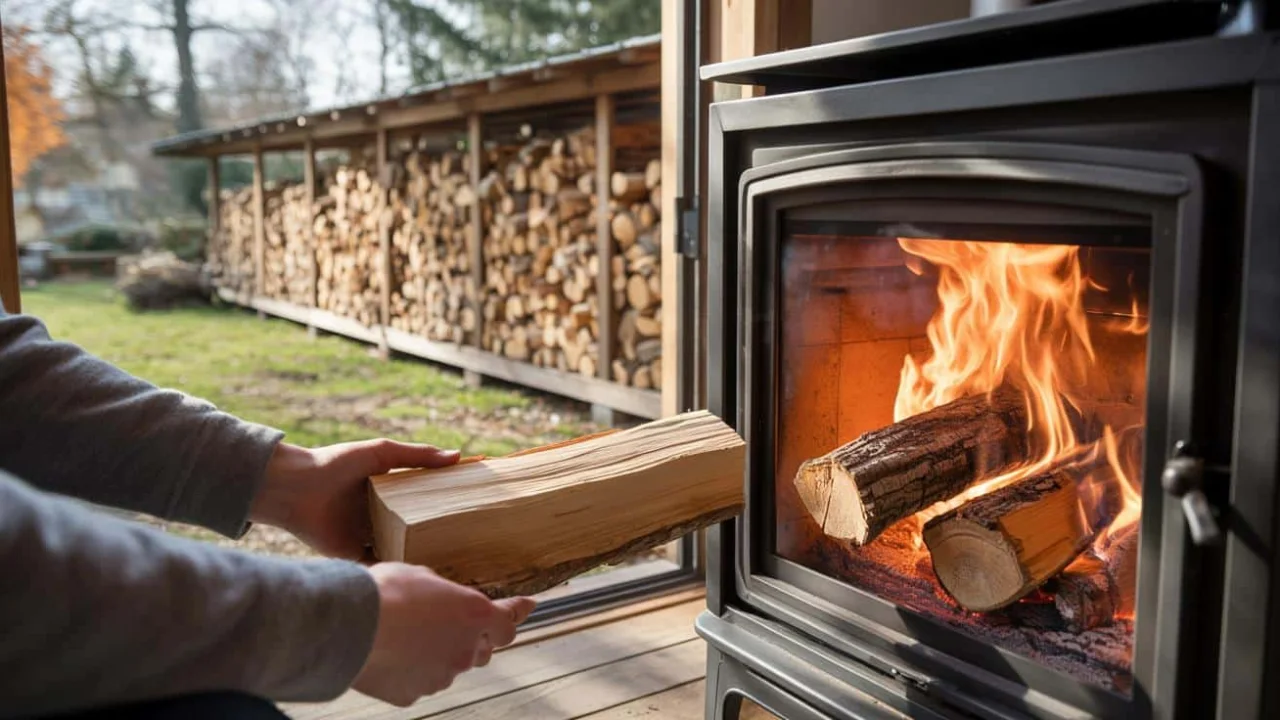
Sarah had been burning wood for three winters, but something wasn’t right. Her living room stayed chilly despite feeding log after log into her beautiful cast-iron stove. The fire looked decent enough, yet her heating bills remained stubbornly high as she cranked up the backup heating.
Then her neighbor mentioned a wood burning technique he’d discovered online. “I’ve been doing it since this week and I saw a real difference,” he told her over the fence. Sarah was skeptical—how much could log preparation really matter?
Two weeks later, Sarah’s house felt like a different place entirely. The same amount of wood now heated her entire downstairs, and the difference was so dramatic that friends started asking what she’d changed.
The Hidden Energy Drain Most Wood Burners Never Notice
Across Europe, millions of households have turned to wood stoves as energy costs soar. Yet most people are unknowingly throwing away nearly half their fuel’s potential heat before the logs even start warming their homes.
The culprit isn’t the stove itself—it’s moisture trapped inside the wood. Fresh logs often contain 40-60% water by weight, and your fire must evaporate every drop before it can produce usable heat.
“When I test wood moisture in people’s homes, I’m shocked by what I find,” says heating engineer Mark Thompson. “Logs that look perfectly dry on the outside can be soaking wet inside. The fire spends most of its energy making steam instead of heat.”
This invisible water creates a cascade of problems. Wet wood burns cooler, produces thick smoke, clogs chimneys faster, and requires twice as many logs to achieve the same room temperature. The fire struggles, homeowners get frustrated, and heating bills stay high despite the wood stove investment.
The Game-Changing Wood Burning Technique Taking Europe by Storm
The method spreading through wood-burning communities isn’t complicated or expensive. It’s a systematic approach to log preparation that can nearly double heat output from the same fuel.
The technique centers on aggressive moisture reduction through strategic splitting, stacking, and timing. Here’s how it works:
Step 1: Split Immediately and Split Smaller
- Split wood within days of delivery, not months later
- Cut logs to 30-40cm lengths maximum
- Split into halves or quarters rather than burning whole rounds
- Create maximum surface area for moisture escape
Step 2: Strategic Stacking for Airflow
- Stack with gaps between pieces for air circulation
- Elevate the pile off the ground using pallets or rails
- Position in the windiest, sunniest spot available
- Cover only the top, leaving sides exposed
Step 3: The Timing Revolution
- Start preparation 12-18 months before burning
- Test moisture levels with a simple digital meter
- Aim for 15-20% moisture content before burning
- Rotate stock using oldest-first system
| Wood Moisture Level | Heat Output | Typical Issues |
|---|---|---|
| 50%+ (Fresh) | Very Low | Heavy smoke, poor burning |
| 30-40% | Poor | Struggles to stay lit |
| 20-25% | Good | Some smoke, decent heat |
| 15-20% | Excellent | Clean burn, maximum heat |
“The difference is incredible once you get moisture below 20%,” explains forestry specialist Emma Rodriguez. “The same log that barely warmed a room suddenly produces intense, sustained heat with minimal smoke.”
Real Results That Are Changing How People Heat Their Homes
Early adopters of this wood burning technique report dramatic improvements within weeks. Online forums buzz with before-and-after stories from households across France, Germany, and the UK.
The impact goes far beyond just warmer rooms. Properly dried wood burns so much cleaner that chimney maintenance drops significantly. Many users find they can heat the same space with 40-50% fewer logs, making their wood supply last much longer.
“I wish I’d known this years ago,” says converted wood burner James Miller. “My chimney sweep used to come twice a year. Now it’s barely dirty after a full season.”
The technique also reduces environmental impact. Efficient burning means fewer emissions per unit of heat, and the reduced wood consumption means less pressure on local forests.
However, the method does require advance planning. The biggest barrier for newcomers is waiting 12-18 months for properly seasoned wood. Many solve this by buying kiln-dried wood for immediate use while building up their own properly dried supply.
Financial Impact on Household Budgets
- 50% reduction in wood consumption for same heat output
- Lower backup heating costs due to improved stove efficiency
- Reduced chimney cleaning and maintenance expenses
- Initial investment: moisture meter ($20-40) plus better storage setup
“The return on investment is immediate once your wood reaches proper dryness,” notes energy consultant David Park. “Families often save hundreds annually on heating costs while enjoying much more comfortable homes.”
Getting Started: Your First Week With Better Wood Burning
The beauty of this technique lies in its simplicity. You don’t need special equipment or major changes to your stove setup. Start by testing the moisture in your current wood pile—you might be surprised by what you discover.
If your existing logs test above 25% moisture, consider investing in some kiln-dried wood for immediate improvement while implementing the preparation method for future supplies.
The most important shift is mental: viewing log preparation as equally crucial as the stove itself. Just as you wouldn’t put dirty fuel in your car, wet wood shouldn’t go into your heating system.
Within days of switching to properly prepared wood, most households notice brighter flames, reduced smoke, and noticeably warmer rooms. The technique transforms wood burning from a frustrating chore into an efficient, satisfying heating solution.
FAQs
How long does wood need to dry using this technique?
With proper splitting and stacking, most wood reaches ideal moisture levels in 12-18 months, depending on climate and wood type.
Can I speed up the drying process?
Yes, splitting smaller and maximizing airflow can reduce drying time by months compared to traditional stacking methods.
Do I need expensive equipment to try this?
No, just a moisture meter ($20-40) and better stacking practices. The technique works with any wood stove or fireplace.
What moisture level should I aim for?
Target 15-20% moisture content for optimal heat output and clean burning. Anything above 25% will significantly reduce efficiency.
Will this work with any type of wood?
Yes, though hardwoods like oak and ash benefit most from proper drying due to their naturally high moisture content when fresh.
How do I know if my current wood is too wet?
Signs include difficulty lighting, excessive smoke, hissing sounds from the logs, and poor heat output despite good flames.
Related Posts